- Table of contents
1. Issues
Issues are the atomic element of any Redmine account. You need to create a project before you can create issues, because every issue is connected to one project.
For example, at Planio we have separate projects for English support tickets and German support tickets, because different team members are working on them. We also have projects for different areas such as marketing and the Planio website.
Let’s create a new issue:
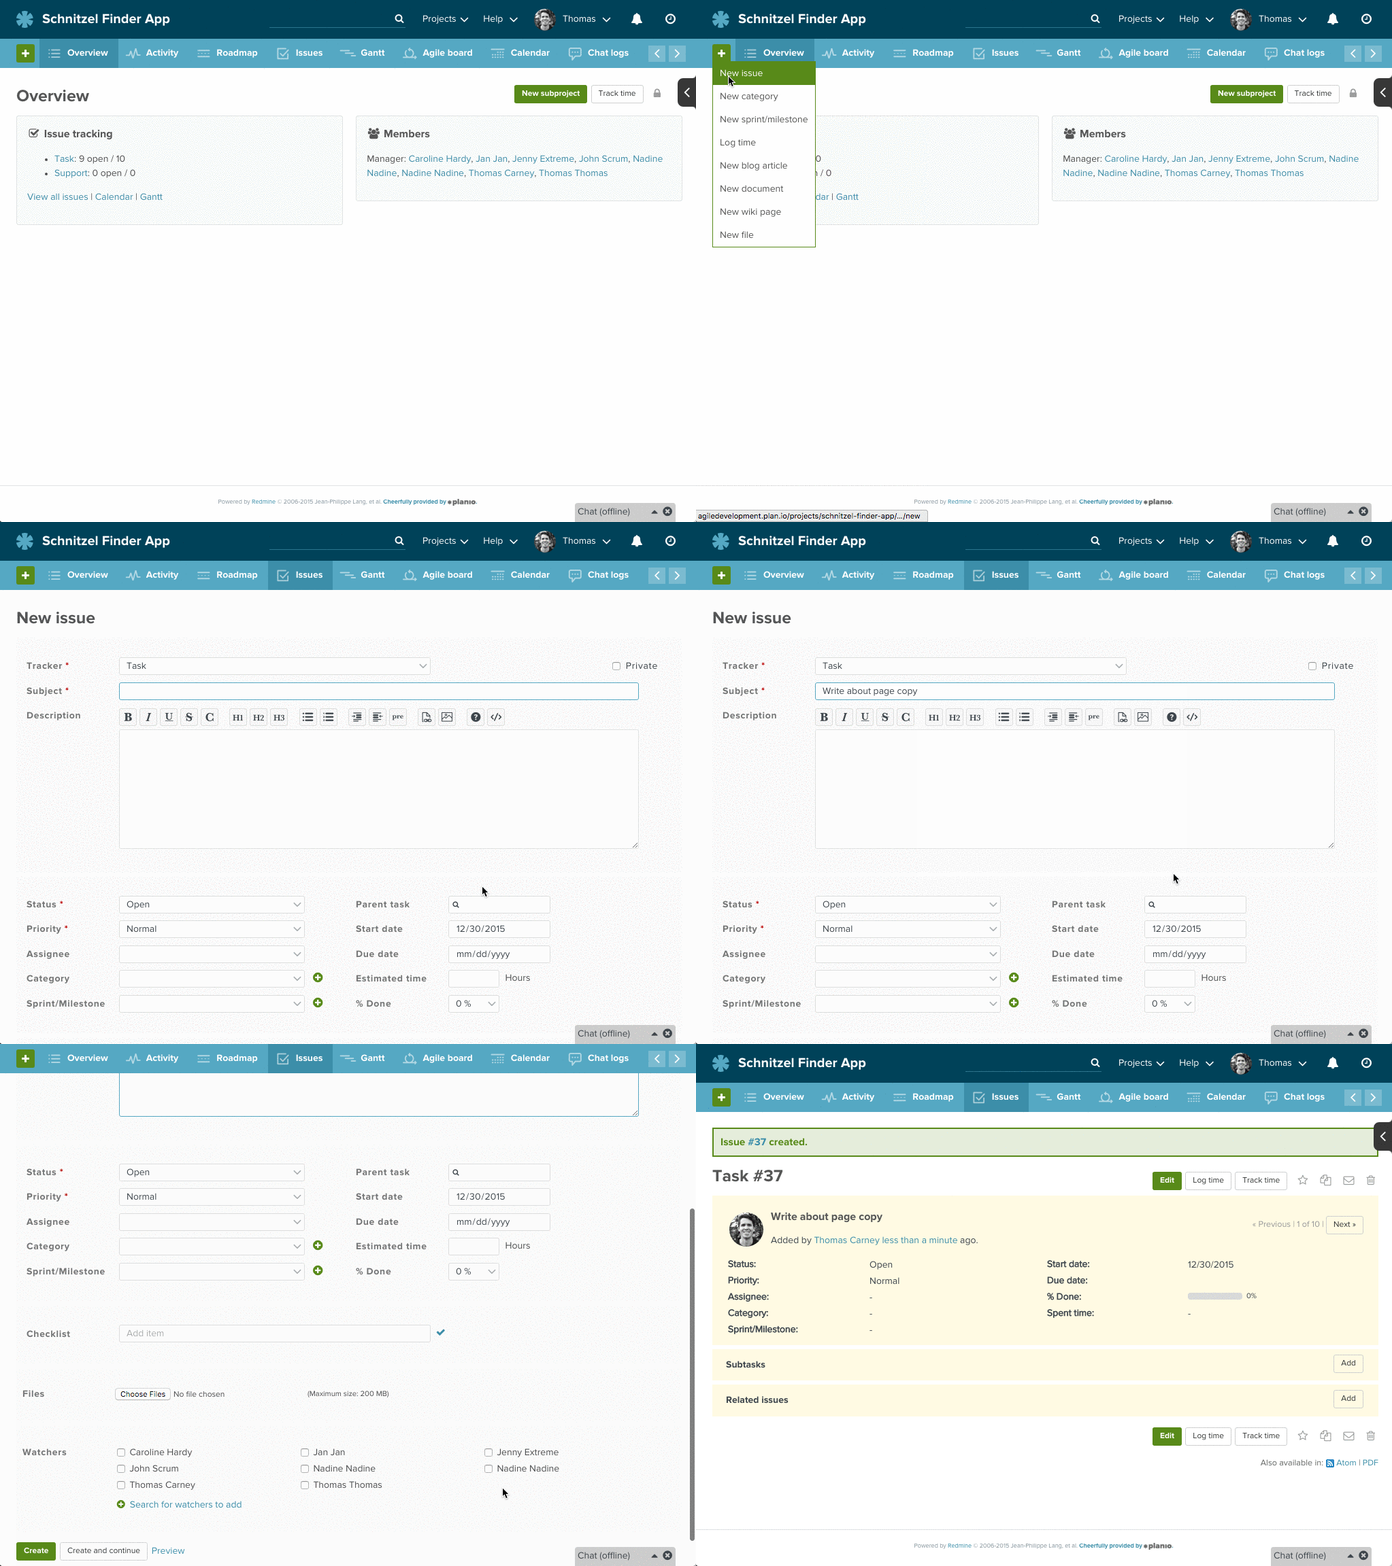
2. Updating Issues
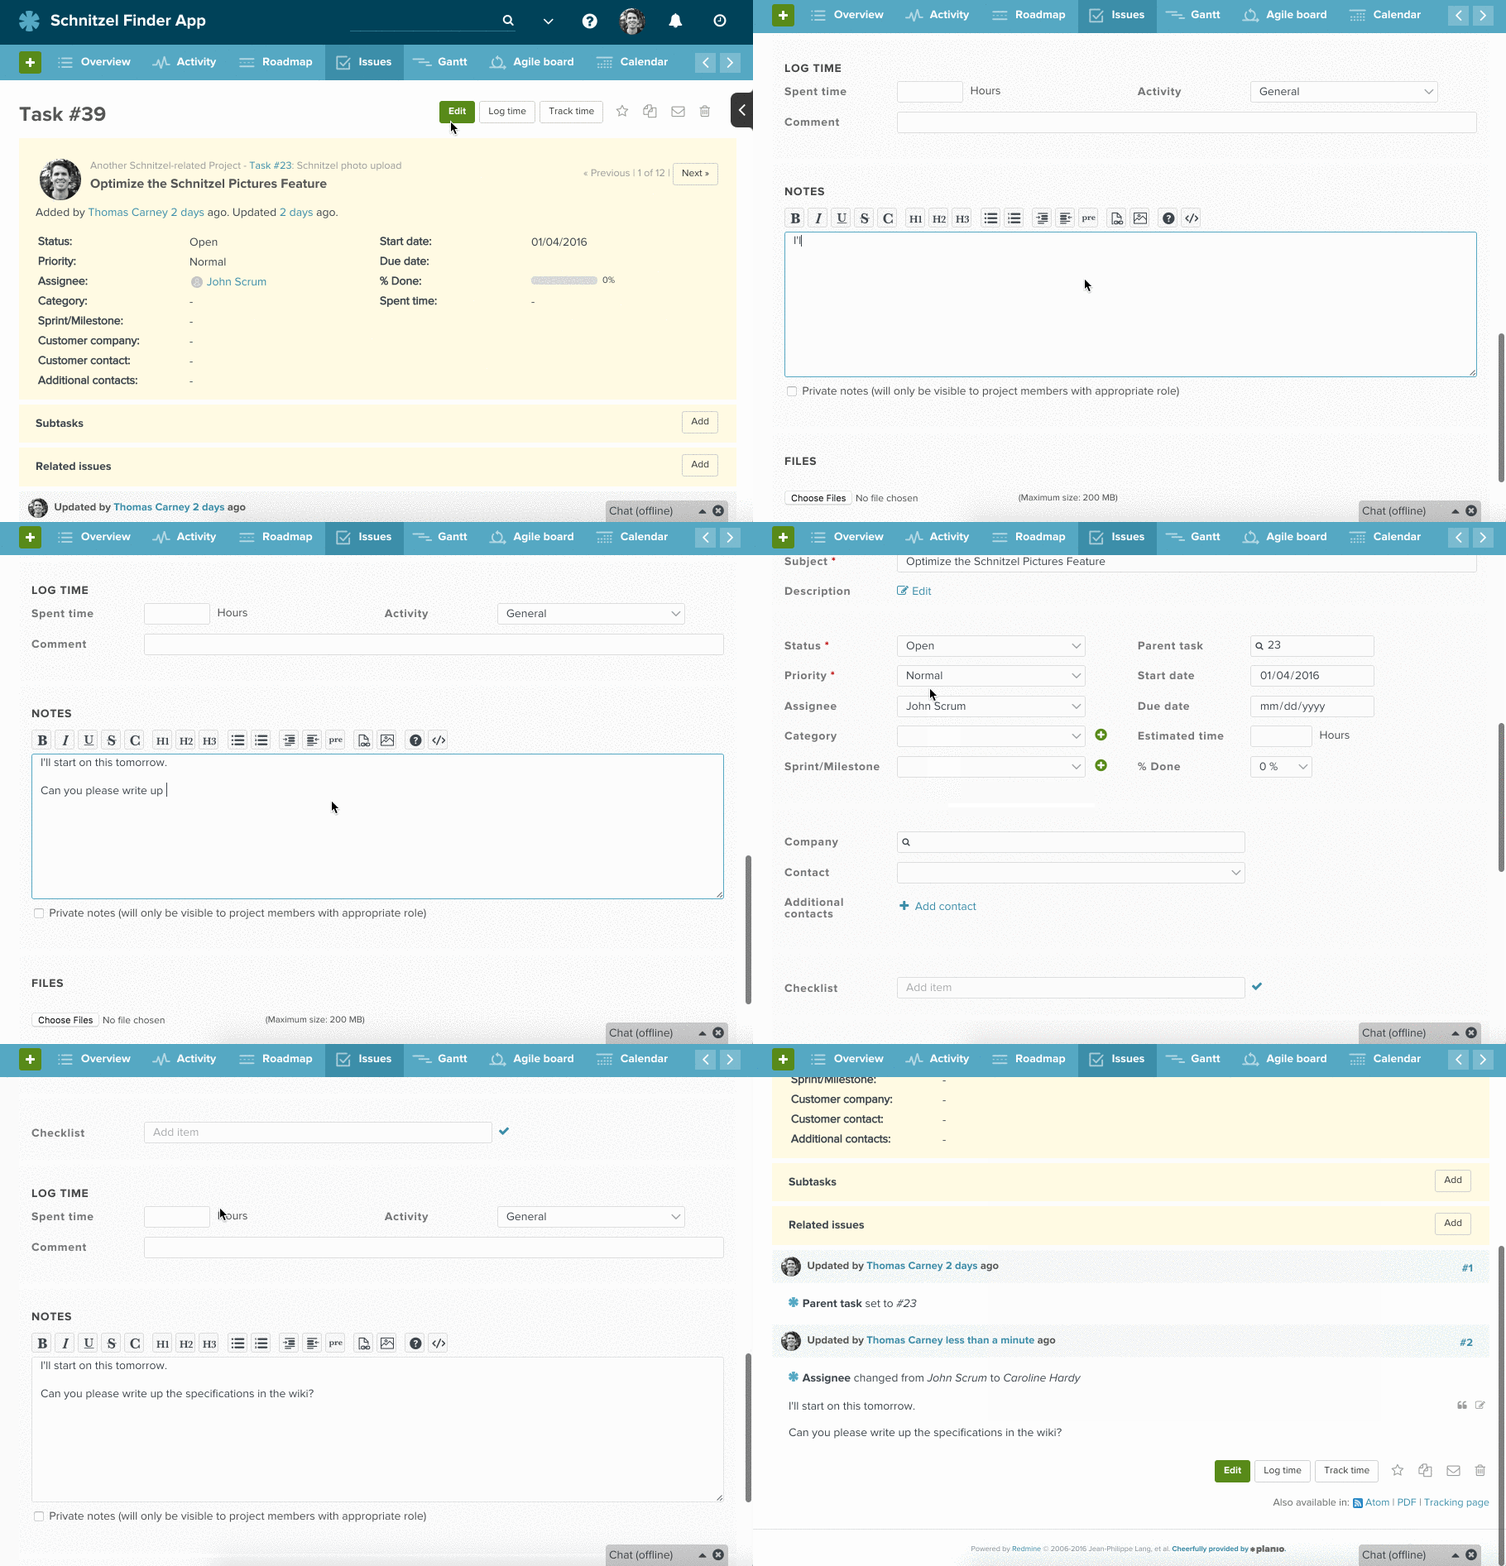
As you progress through a task, you can update the issue with the latest status. You can also re-assign it to someone else and you can add notes with questions or ideas. You can also upload files as attachments.
3. Creating Issues from Email
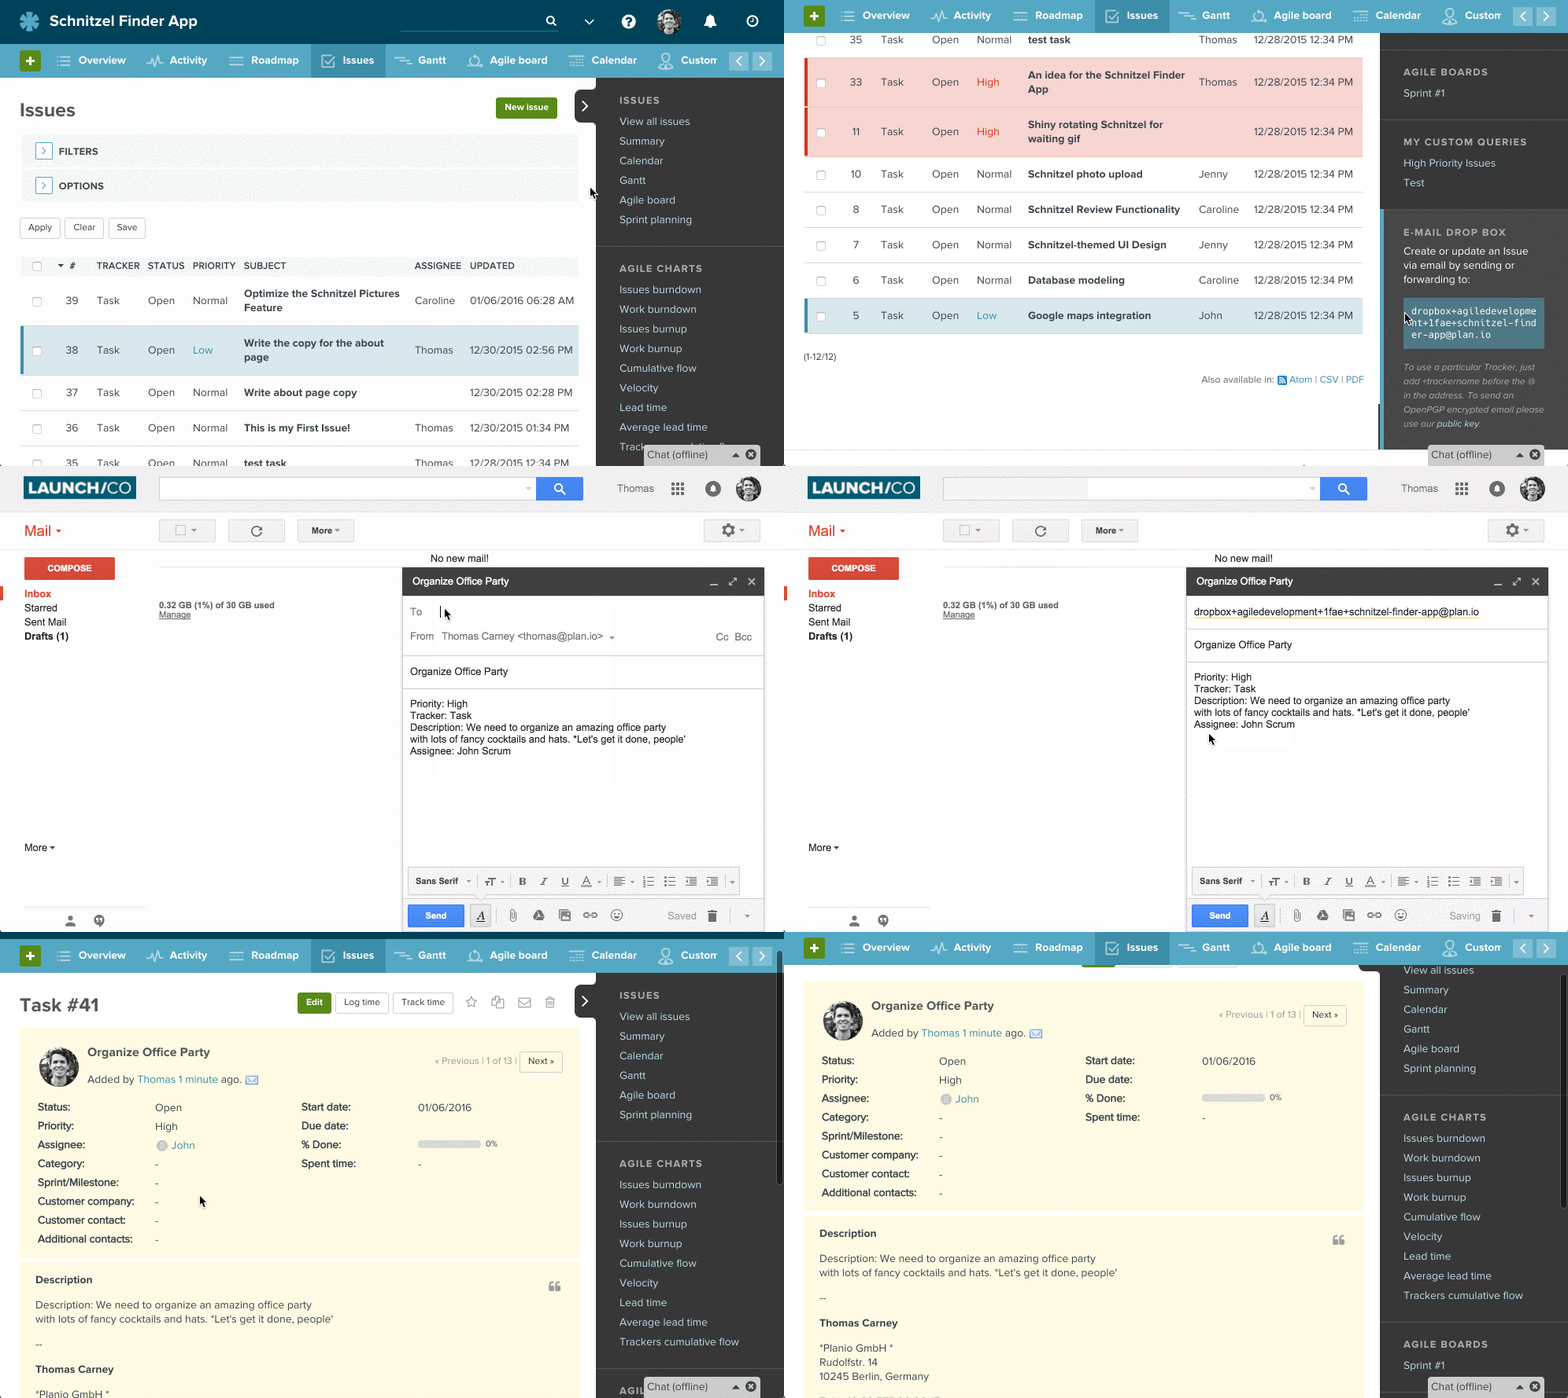
You’re walking around town, getting things done. You realize that you didn’t add the new office party as a task in Redmine.
No problem. You can quickly email your project's Inbox with some details, and an issue will be automatically created in Redmine.
4. The Issue List
You’ve created a bunch of issues, and you want to start to get an overview of the issues.
The issue list is your central hub for seeing the latest status in a project.
In the beginning, it will be easy to see all the issues on one page. However, as you start getting a lot done with Redmine, the amount of issues will grow.
At Planio we have over a quarter of a million issues in our own Planio account. That’s a lot of issues!
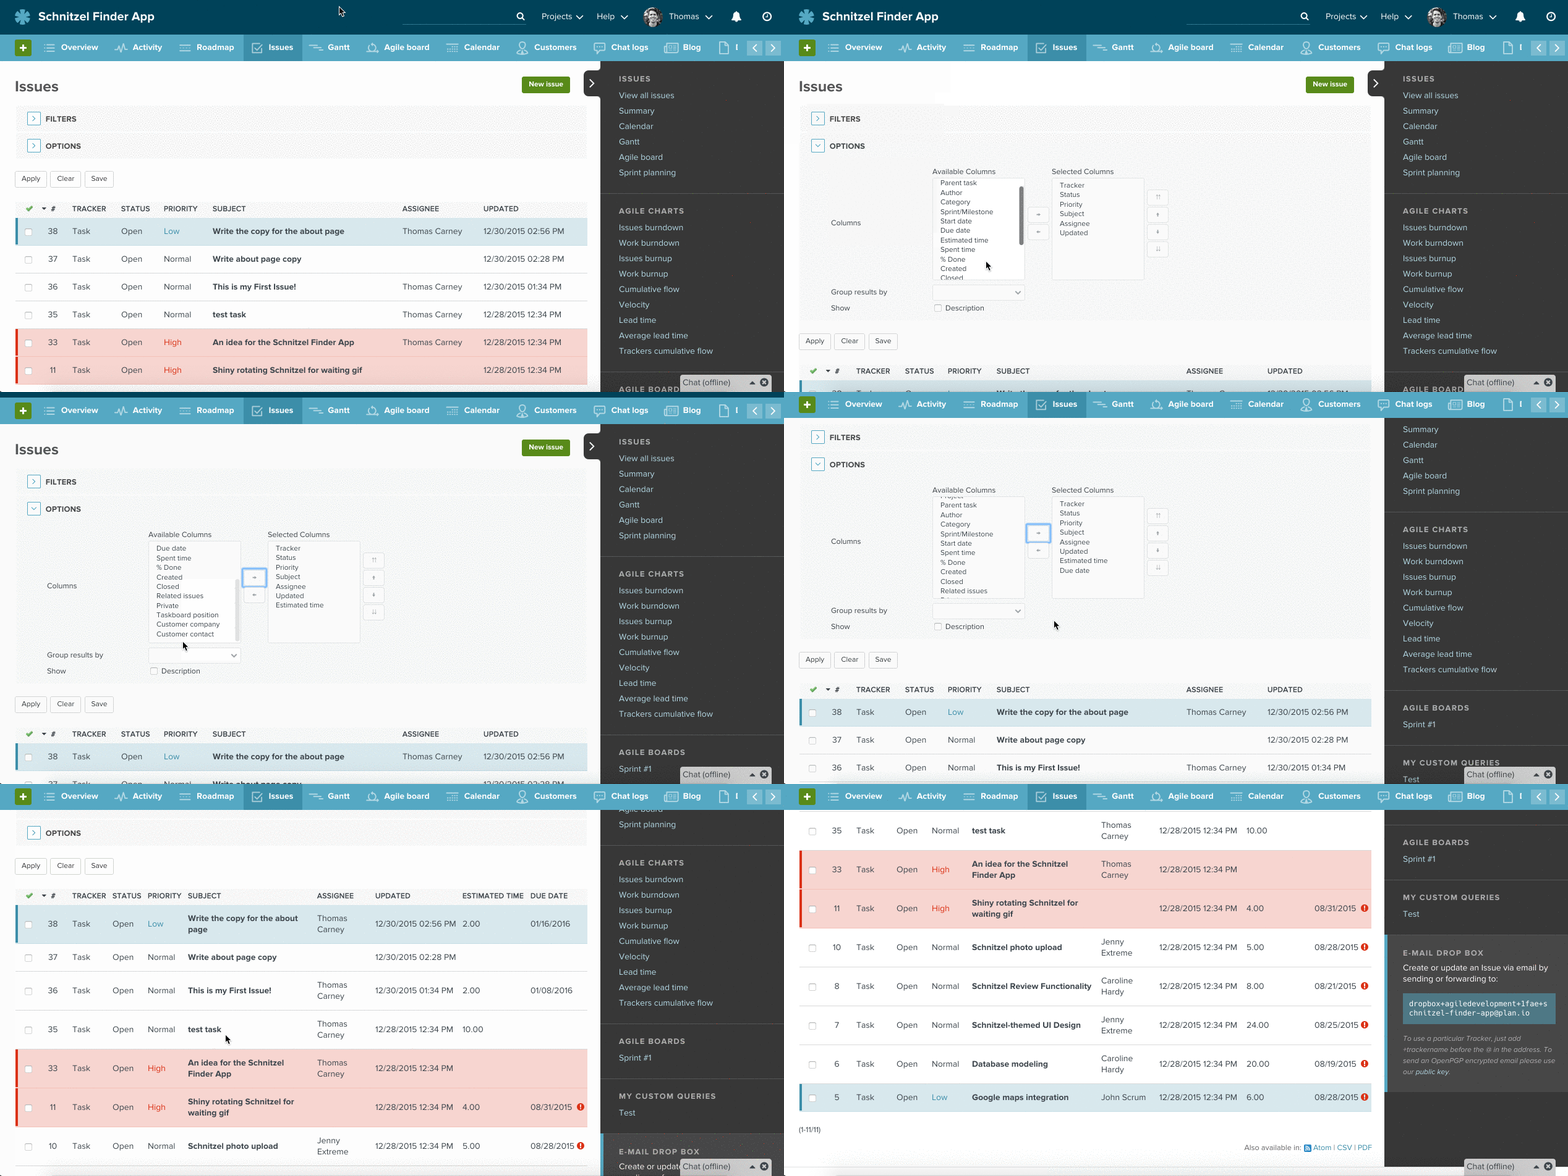
Happily, Redmine comes with powerful ways to drill down into issues, so you can pull out only the relevant issues.
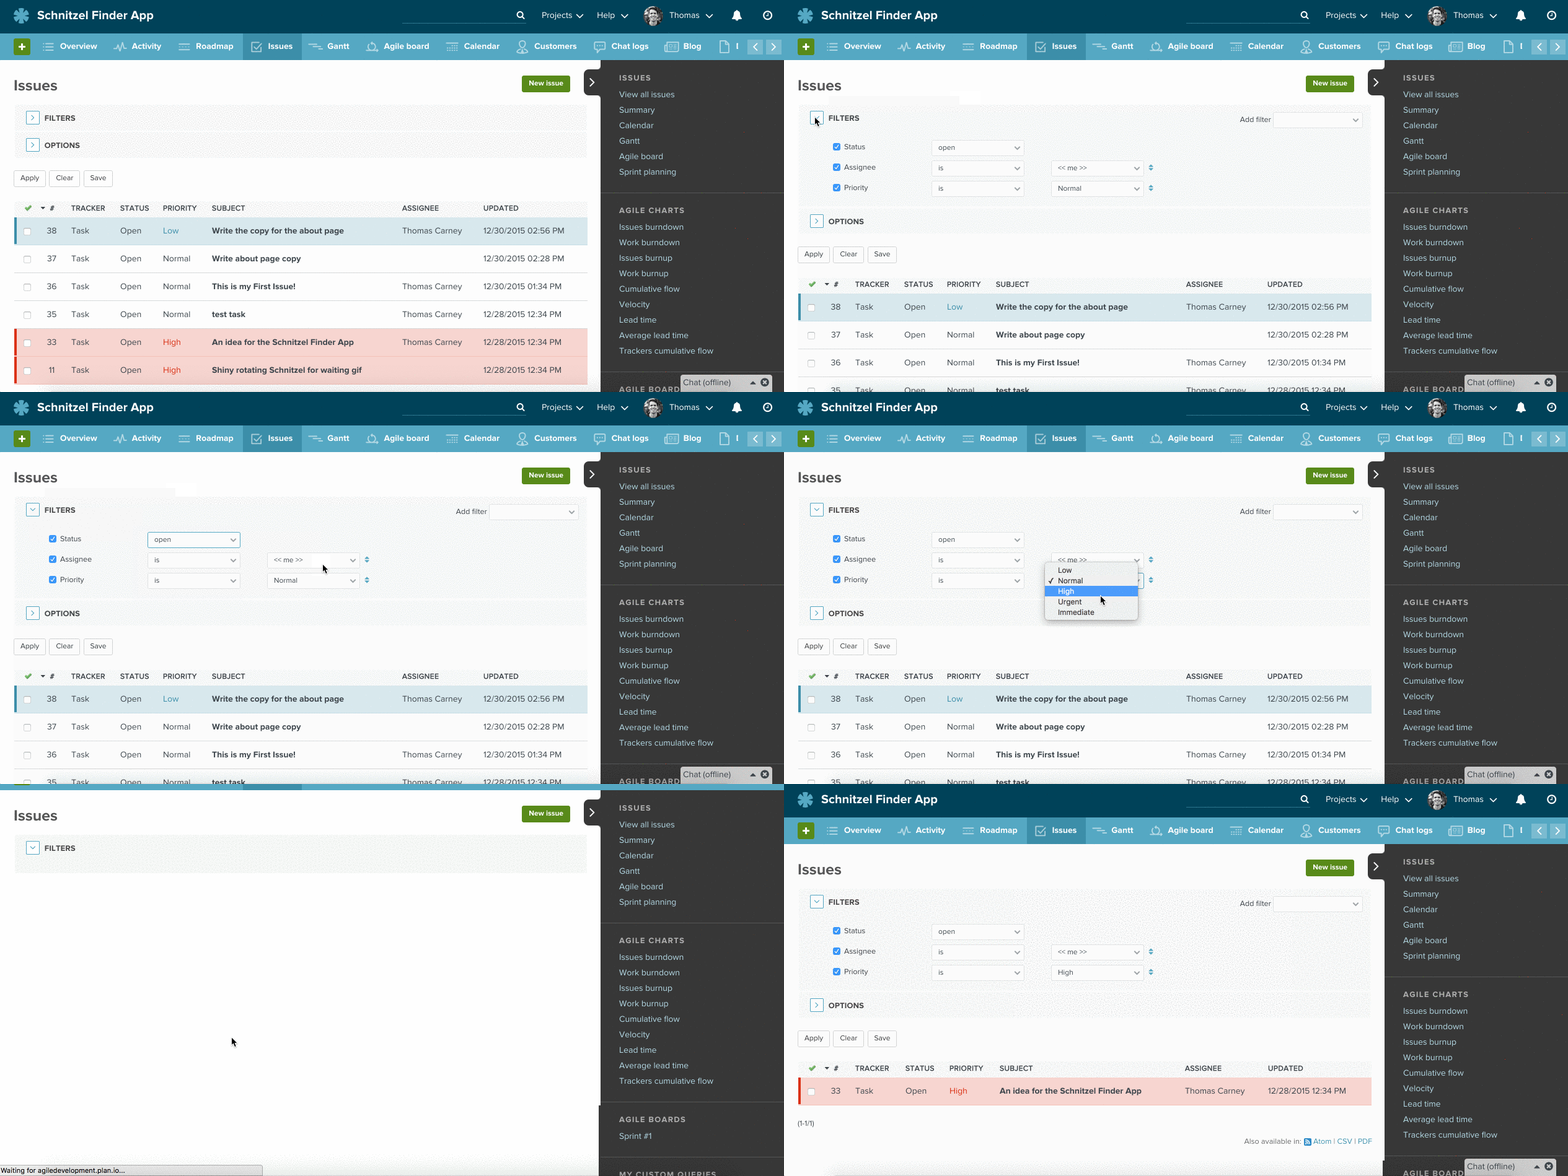
The options let you quickly pull out the information that is relevant to you.
5. Custom Queries
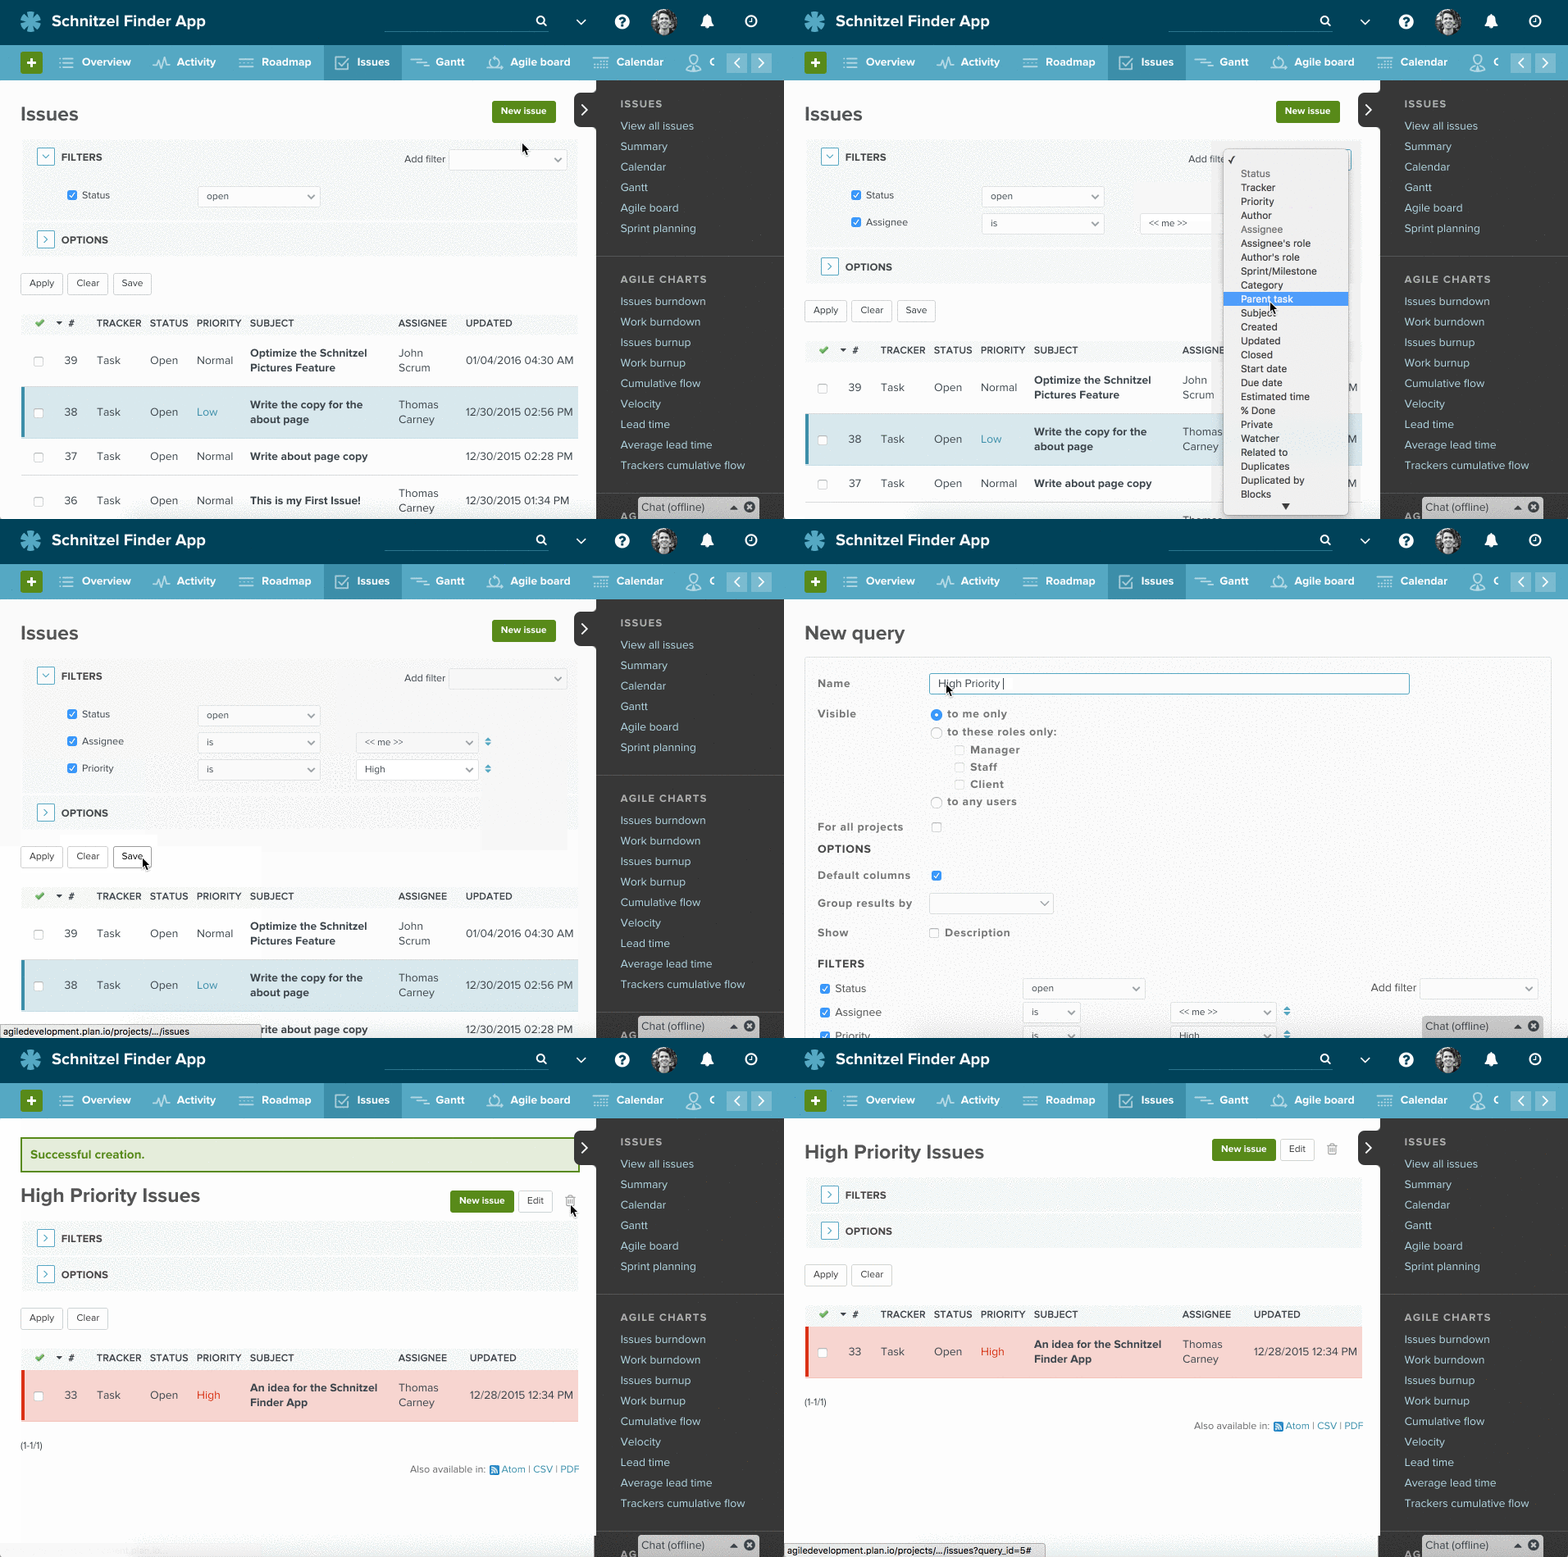
You can save a particular filter for quick access in the future. For example, if you want to see all the high priority issues that are assigned to yourself, you can save that as High Priority Issues and you’ll be able to access it quickly in the sidebar.
6. How do You Use Issues?
Tasks
You have a task to get done? Create an issue and assign it to yourself. Once you’ve done your part, you can assign the task to someone else for review or finishing.
You can use the Task tracker, which is the default tracker. Trackers are just different types of issues. By default, Redmine comes with 3 different trackers. If you don’t know what you should choose, Task is a good choice.
You can tell the person you’re assigning the task to information such as the priority (high, normal or low), and you can set a due date.
Setting a start date and a due date means you’ll be able to visualize the task on the Gantt chart. The assignee will also get email updates if the task isn’t completed on time.
The category field lets you group similar tasks together, which can be handy for finding and reviewing later.
Finally, you can add the task to a particular sprint or milestone, which is a good idea if you want to use Redmine’s project management features.
Ideas
You have an idea? You can quickly store it in Redmine as an issue. You just click on New issue, give it a subject line and then describe your idea in the description.
Often, you’d like other people to get updates on the issue even if they aren’t assigned to it. For example, you want them to hear about your amazing new idea.
Therefore, you can set them as watchers for that issue. They’ll get emails notifying them of any new updates on the issue.
Bugs
Perhaps you’ve found a bug in your web application. You could create an issue in the web app’s project within Redmine and assign it to one of the developers. You can describe the bug, and perhaps include a screenshot as a file attachment.
If you’re an advanced user, you might even consider creating custom fields for bug tracking. For example, you could have a custom field for the OS or browser version. That would let you quickly filter out all the bugs for a particular device or browser.
Support Requests
You can set up Redmine, so that your users can email support@yourcompany.com and their email will show up as an issue in Redmine. This makes it easier to manage the responses.
You can also turn Redmine into a fully featured Help Desk via plugins. For example, we include our own Help Desk in Planio.
When the Help Desk is activated, you’ll see extra fields in issues for the company and contact.
No credit card required. Sign up only takes 60 seconds.